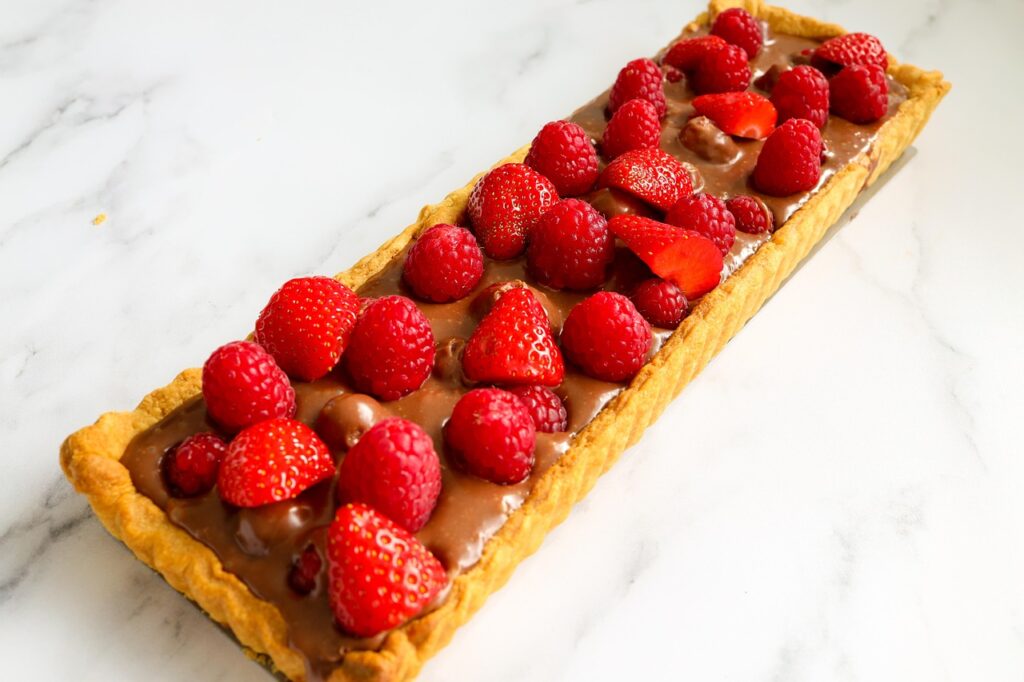
Classic French Tart Crust (Pâte Sucrée)
Ingredients
- 1 1/4 cups (160 g) all-purpose flour
- 1/2 cup (115 g) unsalted butter, cold and cut into small cubes
- 1/3 cup (40 g) powdered sugar
- 1 egg yolk
- 1–2 tablespoons cold water (as needed)
- Pinch of salt
- (Optional: 1/2 teaspoon vanilla extract or zest of 1 lemon for flavor)
Instructions
- Mix the dry ingredients:
In a large bowl, whisk together the flour, powdered sugar, and salt. - Cut in the butter:
Add the cold butter cubes and rub them into the flour with your fingertips or a pastry cutter until the mixture resembles coarse crumbs with pea-sized bits of butter remaining. - Add wet ingredients:
Stir in the egg yolk and vanilla (if using). Add cold water, one tablespoon at a time, until the dough just comes together — don’t overmix. - Form and chill:
Shape the dough into a flat disc, wrap it in plastic, and refrigerate for at least 30 minutes (up to overnight). Chilling helps prevent shrinking during baking. - Roll and fit:
On a lightly floured surface, roll the dough to about 1/8 inch thick (3 mm). Gently transfer it to a 9-inch tart pan with a removable bottom. Press evenly into the edges and trim any excess. - Blind bake:
- Preheat oven to 375°F (190°C).
- Line the crust with parchment paper and fill with pie weights or dried beans.
- Bake for 15 minutes, then remove the weights and parchment.
- Bake another 8–10 minutes, until golden and crisp.
- Cool completely before adding filling.
Tips
- For a savory tart crust (pâte brisée), skip the sugar and add an extra pinch of salt.
- To avoid sogginess, brush the baked crust with egg white and bake for 2 more minutes — this seals the surface before adding wet fillings.
- Keeps up to 2 days at room temp or freezes well for a month.
Why French Tart Crust?
When it comes to creating an exquisite French tart crust, you’re not just working with flour and butter; you’re crafting a delicate foundation that elevates any filling. Understanding the balance of ingredients and mastering the technique can transform a simple dessert into a culinary masterpiece. As you prepare to embark on this journey, you’ll discover the nuances that make all the difference in texture and flavor. Let’s explore what it takes to achieve that perfect crust.
Understanding the Ingredients
When you dive into making a French tart crust, it’s essential to understand the role each ingredient plays in achieving that perfect balance of flavor and texture.
The flour forms the base, providing structure; choose a high-quality all-purpose flour for a tender bite.
Butter, ideally unsalted and cold, adds richness and a delicate flakiness.
Sugar sweetens the crust, enhancing its flavor, while salt brings out the nuances of the other ingredients.
An egg yolk contributes moisture and helps bind the dough, leading to a more cohesive texture.
Lastly, a splash of cold water can bring everything together without overworking the dough.
Each element harmonizes to create a crust that’s both delicious and visually appealing, setting the stage for your tart masterpiece.
Preparing the Dough
As you prepare the dough for your French tart crust, remember that the key to success lies in the technique. Start by chilling your butter until it’s firm but not frozen; this ensures a tender, flaky texture.
In a mixing bowl, combine your flour, sugar, and salt, then cut in the cold butter until the mixture resembles coarse crumbs. You’ll want to work quickly, using your fingertips to avoid warming the butter.
Gradually add ice water, one tablespoon at a time, mixing until the dough just holds together. Avoid overworking it—this will keep your crust light and airy.
Once combined, shape the dough into a disk, wrap it in plastic wrap, and refrigerate for at least 30 minutes to rest.
Rolling Out the Crust
Gently flour your work surface and rolling pin to prevent sticking, then unwrap the chilled dough and place it at the center.
With even pressure, start rolling from the center outwards, turning the dough a quarter turn every few strokes. This helps ensure an even thickness and prevents sticking. If the dough clings, sprinkle a little more flour as needed.
Aim for a uniform thickness of about 1/8 inch; this will yield a tender, flaky crust.
Once rolled out, gently lift the dough with the rolling pin and transfer it to your tart pan. Take care to avoid stretching the dough, as this can lead to shrinkage during baking.
Your crust is now ready for the next step!
Blind Baking Techniques
Blind baking is a crucial technique that ensures your tart crust remains crisp and flaky, especially when using moist fillings.
To start, line your chilled crust with parchment paper and fill it with pie weights or dried beans. This prevents the dough from puffing up. Preheat your oven to 375°F (190°C), then bake for about 15-20 minutes.
Remove the weights and parchment, then return the crust to the oven for an additional 5-10 minutes until golden. You can also brush the inner surface with egg wash during the final bake for added protection against moisture.
Flavor Variations for Tart Crust
Once you’ve mastered blind baking, it’s time to explore the exciting world of flavor variations for your tart crust. You can enhance your tart’s personality by incorporating different ingredients into your dough.
For a nutty twist, try adding ground almonds or hazelnuts to the flour. If you’re aiming for a hint of sweetness, a touch of powdered sugar or a dash of vanilla extract can elevate the flavor beautifully.
Consider infusing your crust with citrus zest, like lemon or orange, to brighten your tart. For a richer taste, experiment with cocoa powder for a chocolatey base.
These simple additions can transform your tart crust, creating a delightful foundation that complements any filling you choose. Enjoy your culinary adventure!
Tips for Perfecting Your Tart Crust
To achieve a flawless tart crust, pay close attention to your ingredients and technique. Start with high-quality butter, ideally cold and unsalted, for a rich flavor.
When mixing, use a gentle touch; you want to keep that butter in small chunks to create a tender, flaky texture. Chill your dough for at least an hour before rolling it out, as this helps maintain its structure.
Roll the dough evenly, ensuring it’s slightly larger than your tart pan to avoid shrinkage. Don’t forget to dock the bottom with a fork to prevent bubbling.
Lastly, par-bake your crust until it’s golden, allowing any filling to shine while maintaining a perfect base. Embrace these tips, and your tarts will elevate beautifully.
Common Mistakes to Avoid
While crafting a perfect tart crust, it’s easy to slip into common pitfalls that can compromise your results. One major mistake is overworking the dough; this can lead to a tough texture. Instead, handle it gently and just until combined.
Another misstep is neglecting to chill the dough adequately. Chilling helps maintain its structure and prevents shrinking during baking. Don’t forget to blind-bake your crust—this ensures a crisp finish and prevents sogginess.
Using the wrong type of flour can also alter your results; opting for all-purpose flour is usually best for a balanced texture. Lastly, always weigh your ingredients for precision.
Conclusion
With your newfound knowledge of crafting the perfect French tart crust, you’re well on your way to impressing friends and family alike. Remember to embrace the delicate balance of ingredients and techniques, allowing each step to enhance your creation. Whether you’re opting for a classic sweet tart or experimenting with savory flavors, the key lies in patience and precision. Enjoy the process, savor the results, and let your culinary creativity shine through every flaky bite.