When it comes to pie crusts, you might find the oil pie crust a refreshing alternative. This method simplifies the process, allowing you to create a tender and flaky base without the fuss of traditional fats. With a neutral flavor that pairs beautifully with both sweet and savory fillings, it opens up a world of possibilities. Curious about how to master this versatile crust? Let’s explore the essential steps and tips to perfecting your oil pie crust.
Here’s a classic oil pie crust recipe — it’s flaky, easy to mix (no rolling pin needed if you press it in), and works great for both sweet and savory pies.
Oil Pie Crust
Ingredients (for one 9-inch crust)
- 1 1/3 cups all-purpose flour
- 1/2 teaspoon salt
- 1/3 cup vegetable oil (or canola oil)
- 3 tablespoons cold water
For a double crust: Double all ingredients.
Instructions
- Mix dry ingredients:
In a medium bowl, combine the flour and salt. - Add oil and water:
In a separate small bowl or measuring cup, whisk together the oil and cold water until they look slightly cloudy and emulsified (this helps the crust come together smoothly). - Combine:
Pour the oil-water mixture into the flour mixture. Stir gently with a fork until it forms a soft dough — it should hold together but not be sticky. If it’s too dry, add a teaspoon of water at a time. - Form the crust:
- For pressed crust: Place the dough directly into your pie dish and press it evenly across the bottom and up the sides using your fingers or the back of a spoon.
- For rolled crust: Flatten the dough into a disc, place it between two sheets of wax paper or parchment paper, and roll it out. Peel off one sheet, invert over your pie plate, and gently press in.
- Trim and crimp edges:
Use a fork or your fingers to shape the edges as desired. - Bake:
- For a baked (empty) crust: Prick the bottom with a fork. Bake at 425°F (220°C) for 10–12 minutes, or until lightly golden.
- For a filled pie: Follow your pie recipe’s baking instructions.
Tips
- If making a sweet pie, you can add 1 tablespoon of sugar to the flour mixture.
- For a richer flavor, try using light olive oil or avocado oil.
- To make it extra tender, replace 1 tablespoon of the water with milk.
What Is an Oil Pie Crust?
An oil pie crust is a delightful alternative to traditional butter or shortening crusts, offering a unique texture and flavor. This versatile crust uses vegetable oil, which blends seamlessly with the flour, creating a tender, flaky finish.
You’ll find that it’s incredibly easy to prepare; simply whisk together the oil, water, and any desired seasonings before incorporating it into the flour. Unlike conventional crusts, there’s no need for chilling, making it a quick option for busy bakers.
The result is a golden, crisp base that perfectly complements sweet or savory fillings. Plus, you can experiment with different oils, like olive or coconut, to infuse your crust with subtle flavors.
Embrace this simple yet elegant approach to pie-making!
Benefits of Using Oil in Pie Crust
While many bakers swear by traditional butter crusts, using oil in your pie crust can offer distinct advantages that elevate your baking experience.
First, oil creates a wonderfully tender and flaky texture, making each bite melt in your mouth. It also mixes easily, eliminating the need for chilling and extensive handling, which means you can whip up your crust in no time.
Additionally, oil provides a neutral flavor that lets your filling shine, whether it’s a sweet fruit or a savory quiche. Plus, you’ll find that oil crusts can be more forgiving than butter, helping you avoid the dreaded sogginess.
With these benefits, you’ll discover a new level of convenience and deliciousness in your baking endeavors.
Essential Ingredients for Oil Pie Crust
To create a delightful oil pie crust, you’ll need just a few key ingredients that come together effortlessly.
Start with all-purpose flour, as it provides the perfect base for your crust’s structure. Next, choose a neutral oil, like vegetable or canola, which ensures a tender texture without overpowering flavors.
Add a pinch of salt to enhance the overall taste, and don’t forget a bit of sugar if you’re aiming for a sweeter crust. Finally, incorporate cold water gradually; this helps bind the ingredients while keeping the dough manageable.
With these essentials in hand, you’ll be ready to whip up a pie crust that’s not only easy to make but also deliciously flaky and satisfying.
Step-by-Step Guide to Making Oil Pie Crust
Making an oil pie crust is a straightforward process that yields delicious results. Start by whisking together your flour and salt in a large bowl. Gradually drizzle in the oil, using a fork to combine until the mixture resembles coarse crumbs.
Next, add cold water, one tablespoon at a time, mixing gently until the dough holds together. Avoid overworking it; you want a tender crust.
Once combined, shape the dough into a disc, wrap it in plastic wrap, and refrigerate for at least 30 minutes. This resting period helps the crust maintain its shape.
Finally, roll out the chilled dough on a floured surface to your desired thickness, ready for your favorite filling. Enjoy the ease and flavor of your homemade oil pie crust!
Tips for Perfecting Your Oil Pie Crust
Achieving the perfect oil pie crust requires attention to detail and a few key techniques. First, choose a neutral oil like canola or grapeseed for a light flavor.
Mix your dry ingredients well before adding the oil, ensuring even distribution. When combining, use a fork to gently incorporate the oil, avoiding overworking the dough. This keeps your crust tender.
Chill your dough for at least 30 minutes; it helps prevent shrinkage. Roll it out on a lightly floured surface, and don’t be afraid to patch any cracks with excess dough.
Finally, pre-bake your crust for a crisp texture, especially if it’ll hold a moist filling. With these tips, you’ll create a delectable oil pie crust every time.
Sweet vs. Savory: Versatility of Oil Pie Crust
Oil pie crusts shine in their versatility, effortlessly adapting to both sweet and savory creations. When you’re whipping up a classic apple pie, the rich, flaky texture of an oil crust complements the sweetness beautifully.
Just imagine the buttery aroma mingling with cinnamon and sugar—it’s irresistible. On the savory side, an oil crust serves as the perfect base for quiches or vegetable tarts, allowing the flavors of fresh herbs and cheeses to shine through.
You’ll appreciate how easily it accommodates a variety of fillings, enhancing your culinary creativity. Whether you’re craving dessert or a hearty meal, this adaptable crust ensures your dishes are both delicious and satisfying, making it a wonderful addition to your baking repertoire.
Common Mistakes to Avoid
While creating a delicious oil pie crust can be a rewarding experience, several common mistakes can undermine your efforts.
One major pitfall is using the wrong type of oil; stick to neutral oils like canola or vegetable for the best results.
Another mistake is overmixing the dough. You want just enough mixing to combine the ingredients without developing gluten, which leads to a tough crust.
Don’t forget to chill the dough before rolling it out; this helps maintain its structure.
Also, be cautious with your measurements—too much liquid can make your crust soggy.
Finally, ensure your oven is preheated adequately; a hot oven helps create that perfect flaky texture.
Avoid these missteps, and you’ll enjoy a beautifully crafted oil pie crust.
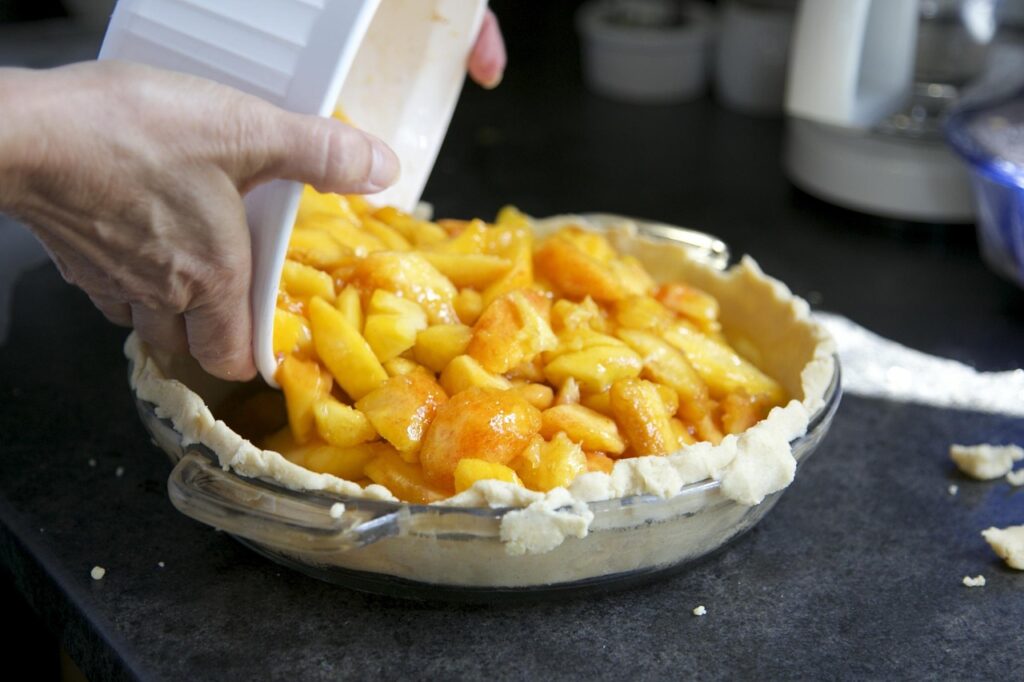
Delicious Filling Ideas for Your Oil Pie Crust
There’s something truly delightful about pairing a flaky oil pie crust with a variety of scrumptious fillings. You might start with a classic apple filling, spiced with cinnamon and nutmeg, creating a warm, inviting aroma.
For a twist, consider a rich chocolate ganache, perfect for satisfying any sweet tooth. If you prefer something savory, a quiche filled with creamy eggs, cheese, and your choice of vegetables makes for a hearty option.
Don’t forget about seasonal fruits; a fresh berry medley with a touch of lemon zest is both refreshing and vibrant. Each filling complements the crust’s buttery texture, enhancing your overall pie experience.
Conclusion
Incorporating an oil pie crust into your baking repertoire opens up a world of possibilities. Its ease and versatility allow you to create both sweet and savory delights, all while achieving that perfect flaky texture. By following the tips and techniques outlined, you’ll master this simple yet elegant crust in no time. So, gather your ingredients, experiment with fillings, and enjoy the delicious results of your oil pie crust creations—your taste buds will thank you!